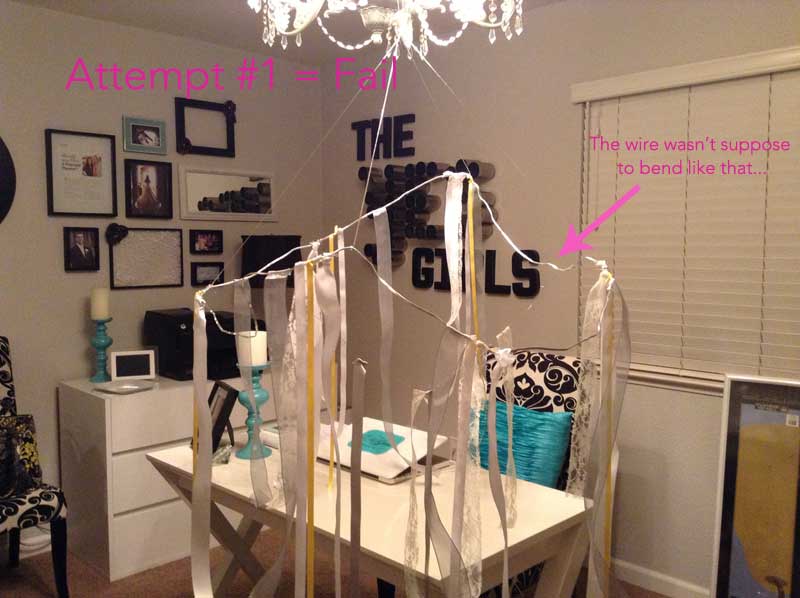
We have a marriage proposal coming up that called for a DIY ribbon chandelier. I’m purposely leaving out more details; you never know who is reading! Anywho, I picked up all the items necessary- ribbons, silver wire, fishing wire, etc. to create what I was picturing in my head, however round one didn’t go over so well. I thought I would show you the behind-the-scenes of a complete FLOP of a DIY! Luckily, round two went according to plan! DIY’s can be such a trial and error process and that is exactly what this (what I thought would be so simple) project turned into. Have a gander.
First attempt….uhhhh not exactly what I was going for.
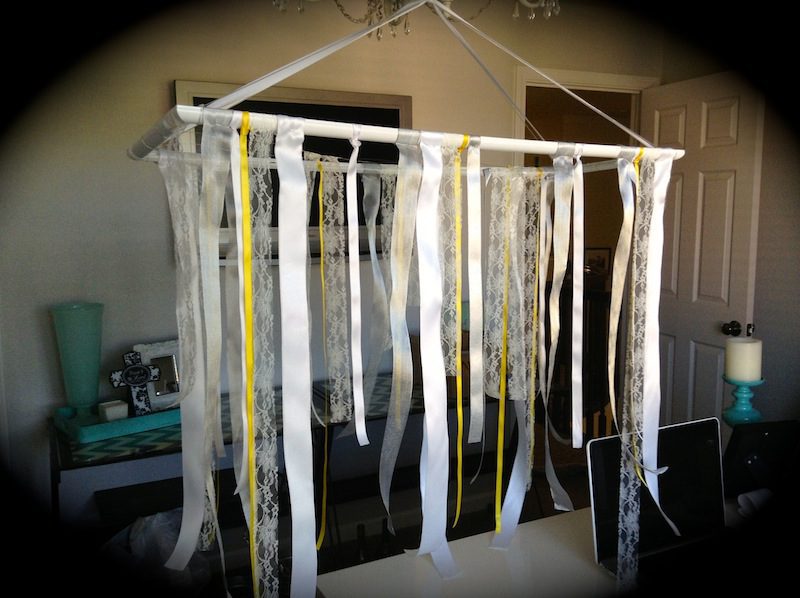
Round Two: Instead of thick wire to create the frame for the chandelier, I used a lightweight wooden picture frame so it wouldn’t bend. Success!
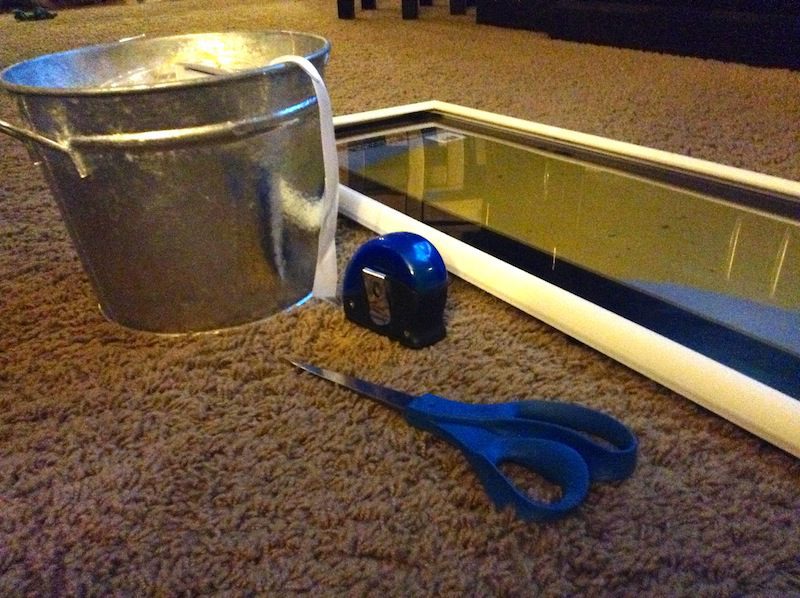
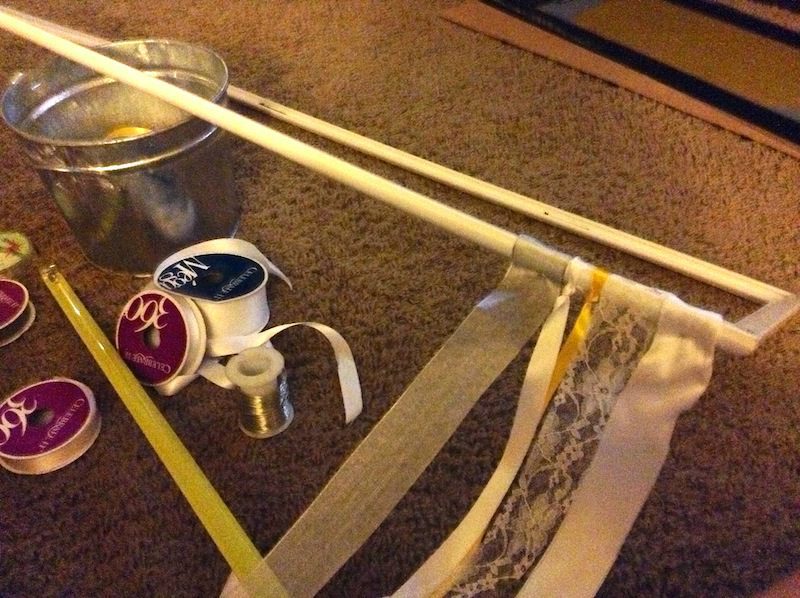
The materials needed and a few pointers to create your own DIY ribbon chandelier.
1. Remove the glass from your picture frame as you only need the wooden frame piece. I used an 3 x 1.5 ft frame for this ribbon chandelier.
2. Line up your ribbon in the order you desire so you visually see which pattern you’ll create.
3. Measure and cute each ribbon so you have some consistency even if you are going for various heights like I did. Tip: Use a touch of hair spray or even clear nail polish to seal the ends to avoid unraveling.
4. Tie each ribbon to your white frame. I used thin jewelry wire to attach a few of the wider ribbons to avoid the “bunched” look at the top. Some may want to cover up the entire white frame. For this project we have it more sparse for the whimsical feel.
6. Cut two pieces of thin jewelry wire and tie parallel to each inside the frame. This creates two more lines for dimension within the frame. Hang a few of your ribbon pieces from the thin wire lines.
7. Cut 4 lines of fishing wire and/or ribbon (two longer than the others to create a loop at the top). Tie the four pieces to each of the corners. I used fishing wire and white ribbon for an extra dose of security since it will be hanging outside.
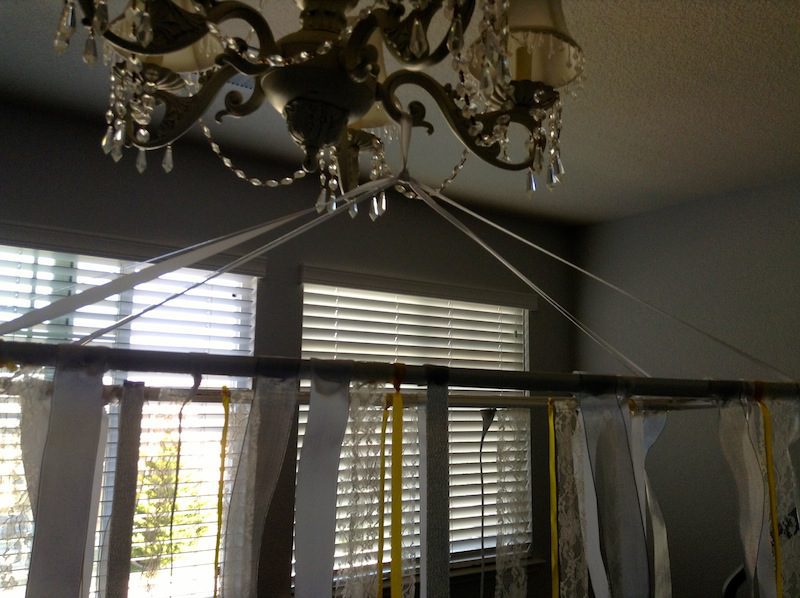
And now you have yourself a make-shift chandelier!
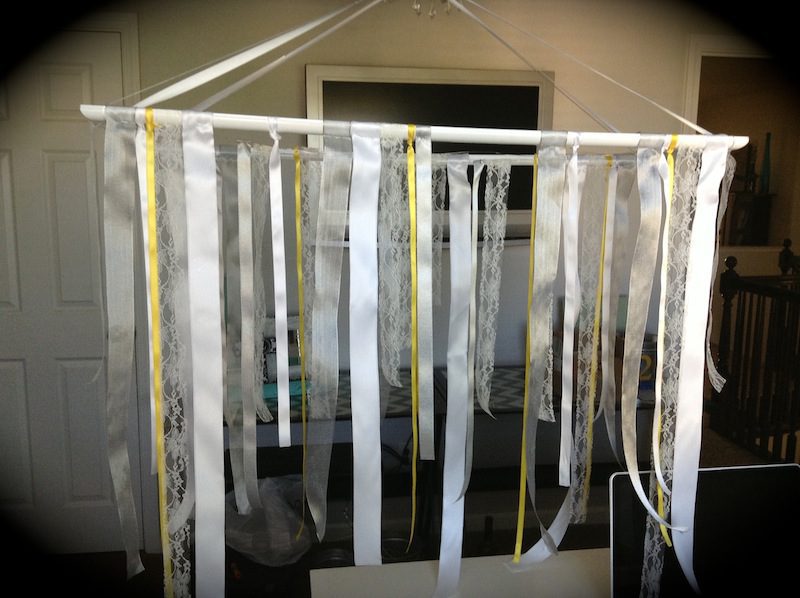
After I got a more solid but very lightweight framework it became rather easy! This would be so cute above a sweetheart table at a wedding or even in a baby nursery. I’m excited to see it with the rest of the set up this weekend!