Published: August 11, 2016
Share
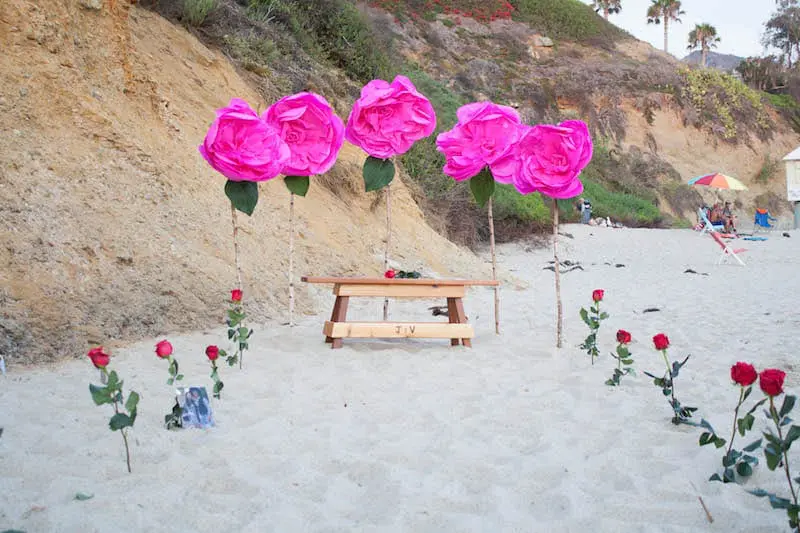
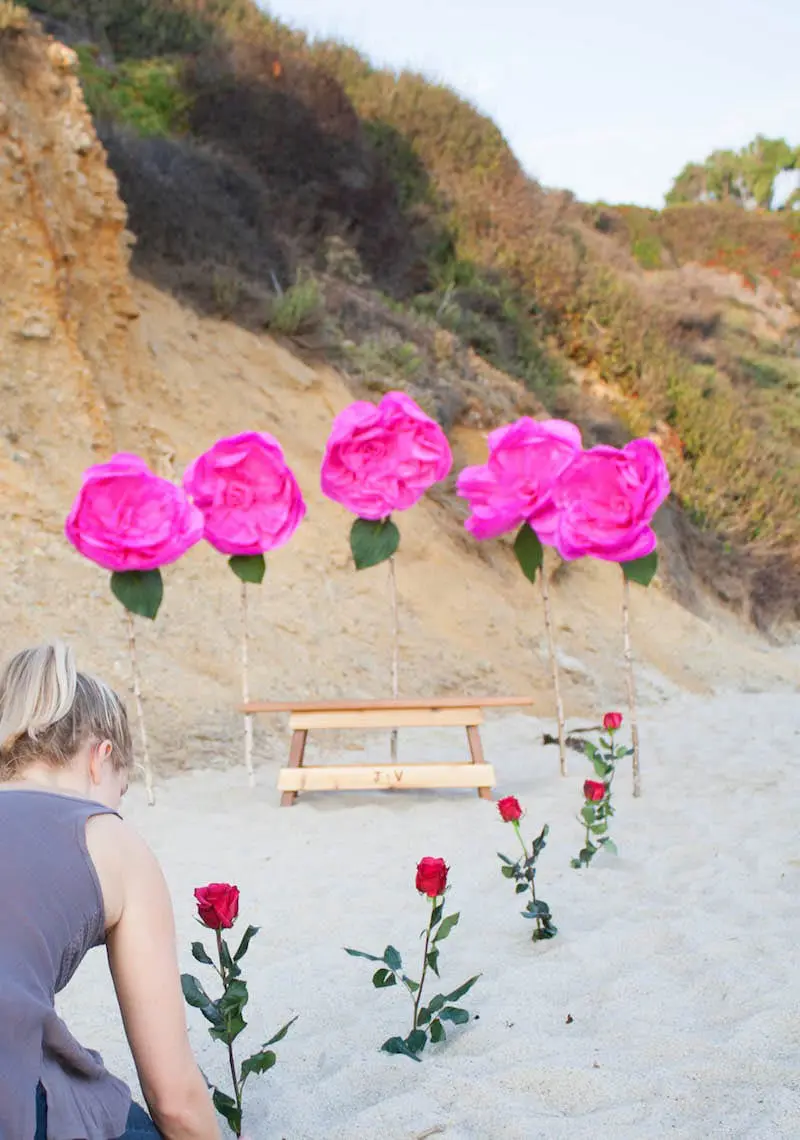
Recently, we created extra-tall, six-foot-tall tissue paper flowers for a proposal backdrop! So I decided to make a little DIY Tutorial so that all our awesome readers can make some of these for your next event. They are so cute, and really not too expensive.
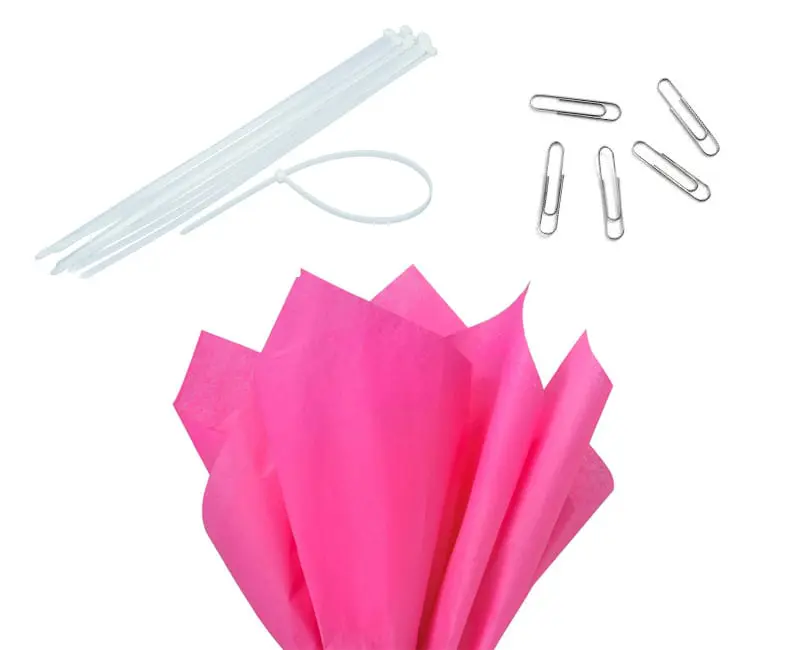
Supplies for 1 Rose:
- 20 sheets of tissue paper
- 4 jumbo paper clips
- 4 zip-ties
- 2 pieces of fiber tissue paper
- 1 rubber band
- 1 6ft stick
- 1 large green leaf
- Double sided tape
STEP ONE:
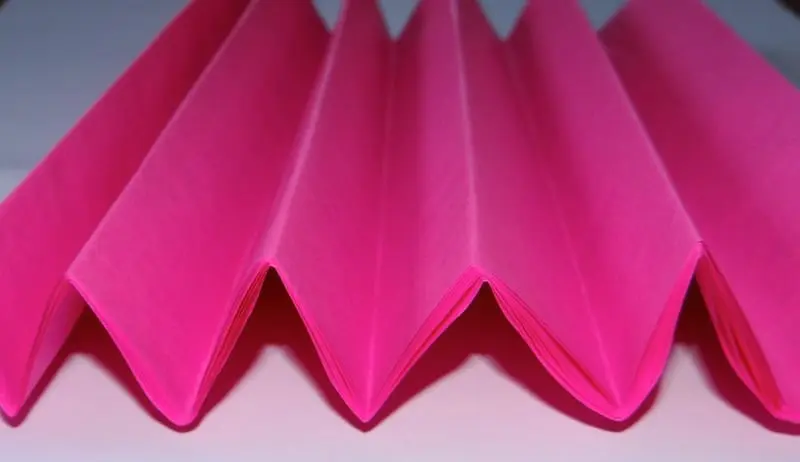
- Take 6 pieces of tissue paper together and fold them together “accordion style”.
- Then paper clip the bundle together on one side about 5 inches away from the edge.
STEP TWO:
- Cut the tissue paper around the edges into the shape of a big heart, these will be the bigger petals of the rose.
- Pull up the tissue paper to separate the petals and fluff them up towards the other side.
- Repeat this 3 more times.
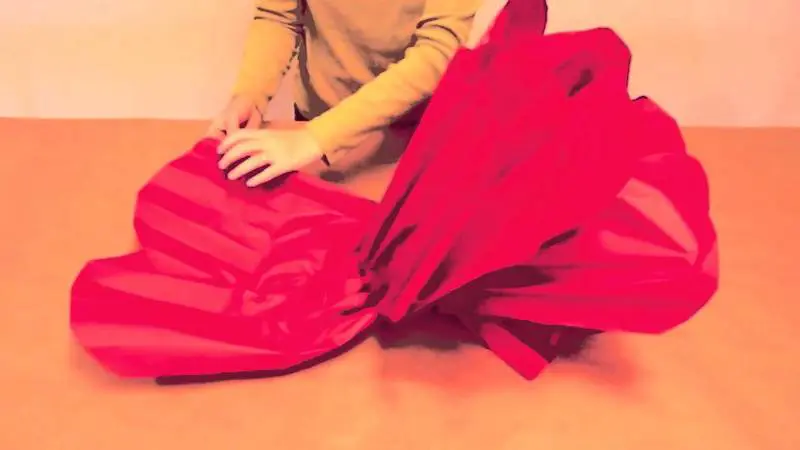
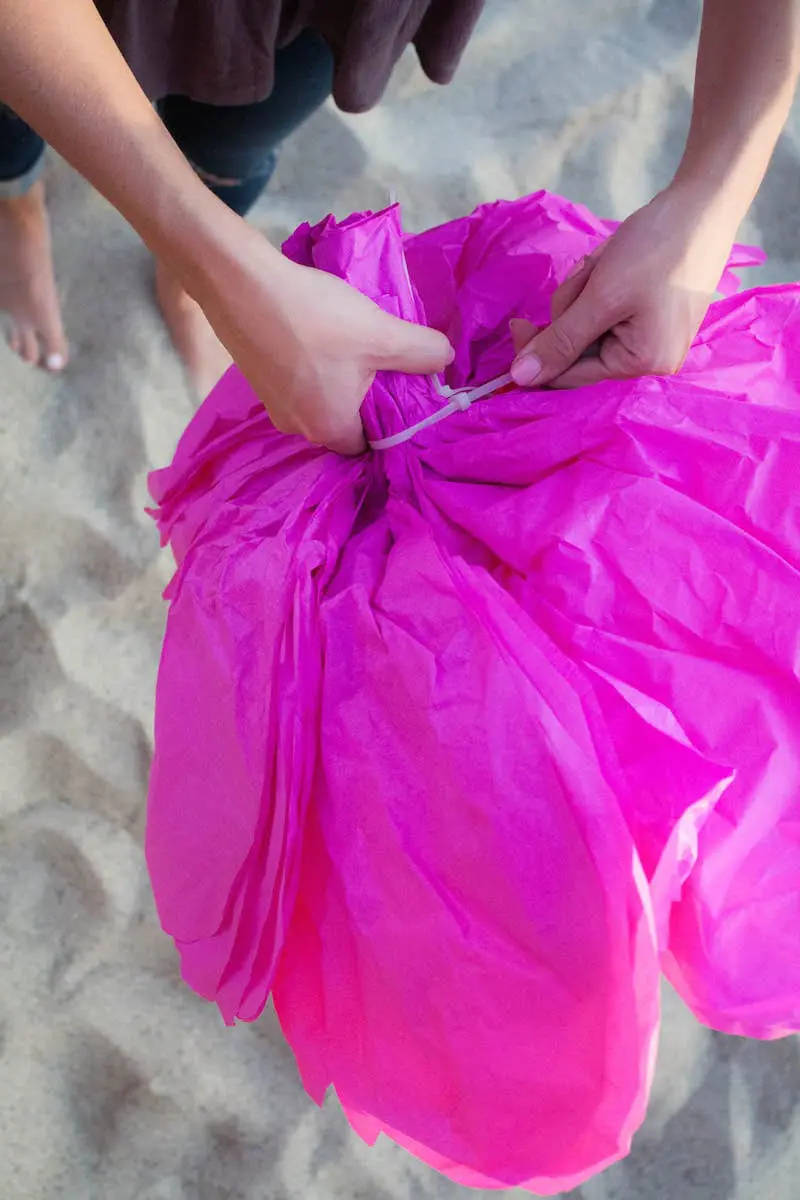
Image from How2TriedandTrue - Once you have all 4 pieces, take the bottoms of each one and start to bring the together. All your petals should be facing up with a “stem” starting to form on the bottom.
- Take one zip-tie and tie them up all together.
STEP 3:
- Take one sheet of your fiber tissue paper, fold it in half, and then twist the outside edges in towards the center while wrapping it around and around. This will start to give you the look of the center of a rose.
- Take your other piece of fiber tissue paper and cut it into 4 pieces with the edges mimicking that heart shape to look like petals. Take those 4 pieces and rubber band them to the bottom part of the center of the rose you just made.
- Now take the small rose you just made and run a zip-tie through the rubber band, push it through the center of the large petals you made until you see the zip-tie come through the other side.
- Now loop the zip ties together, and pull! You now have your first rose completed!

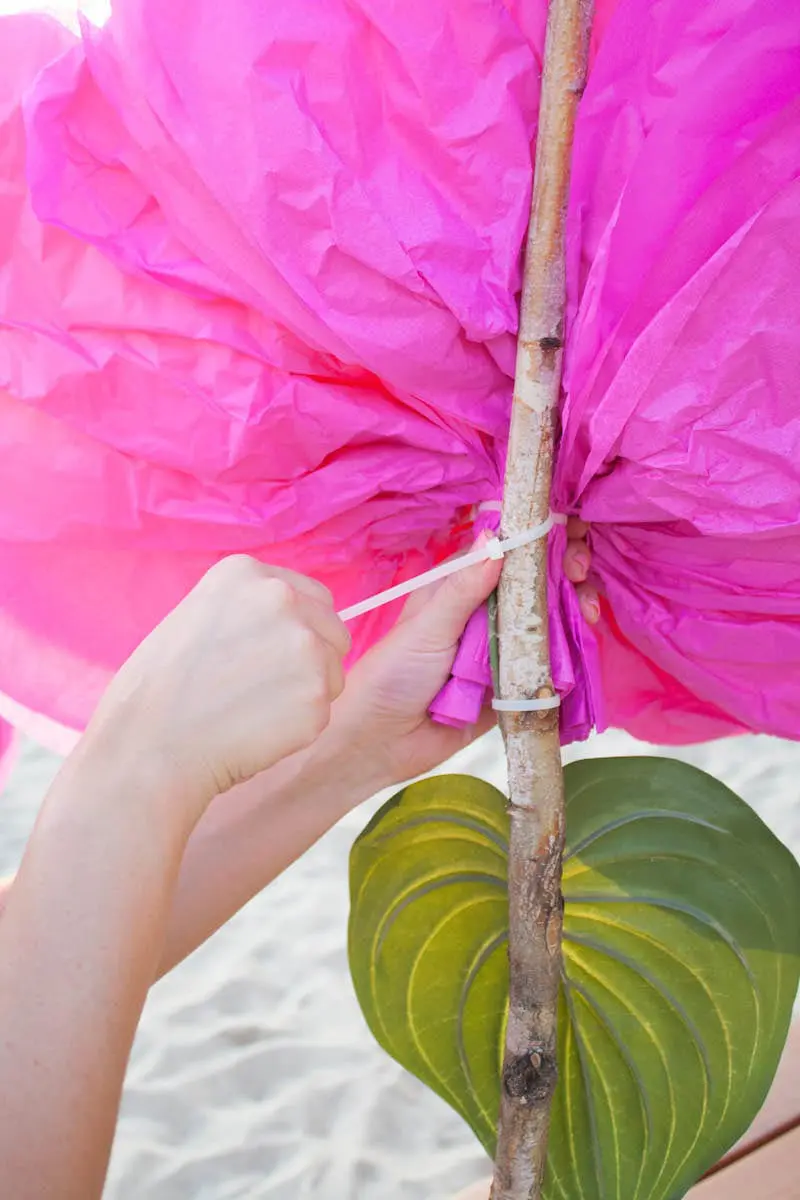
STEP 4:
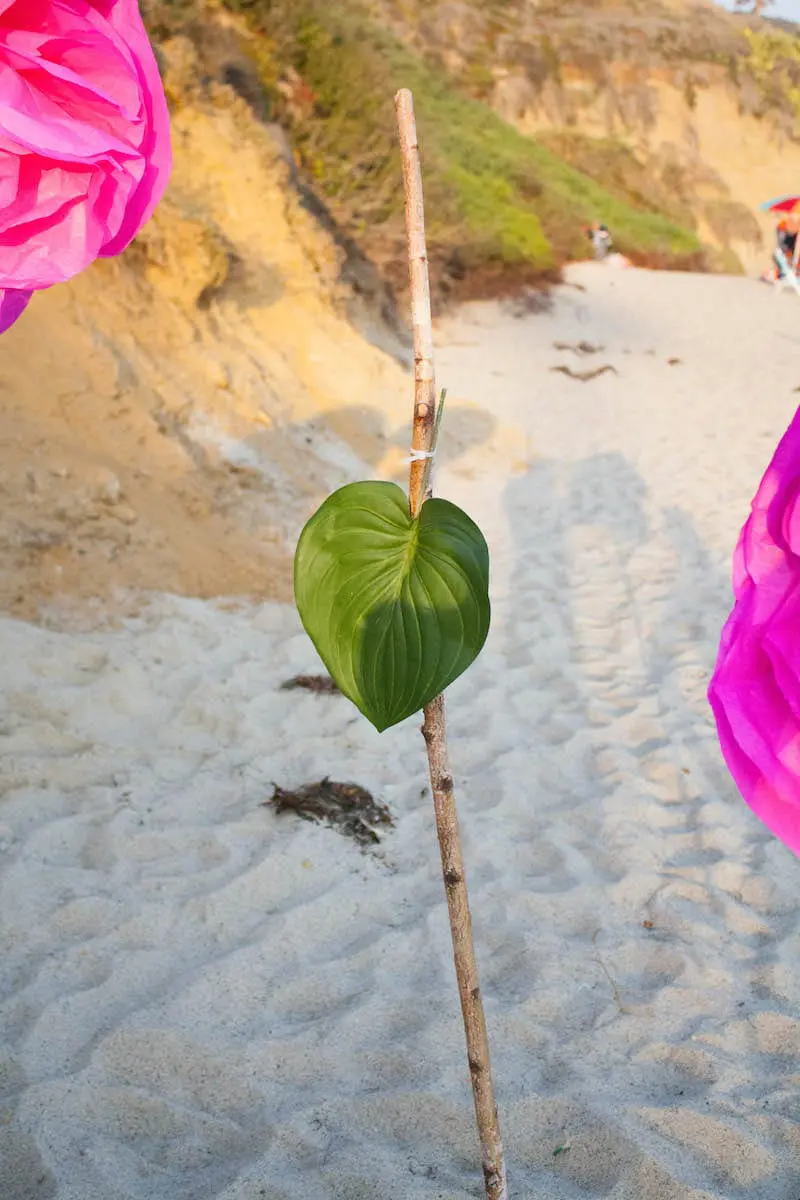
- Zip-tie your big green leaf onto the 6ft stick “stem”.
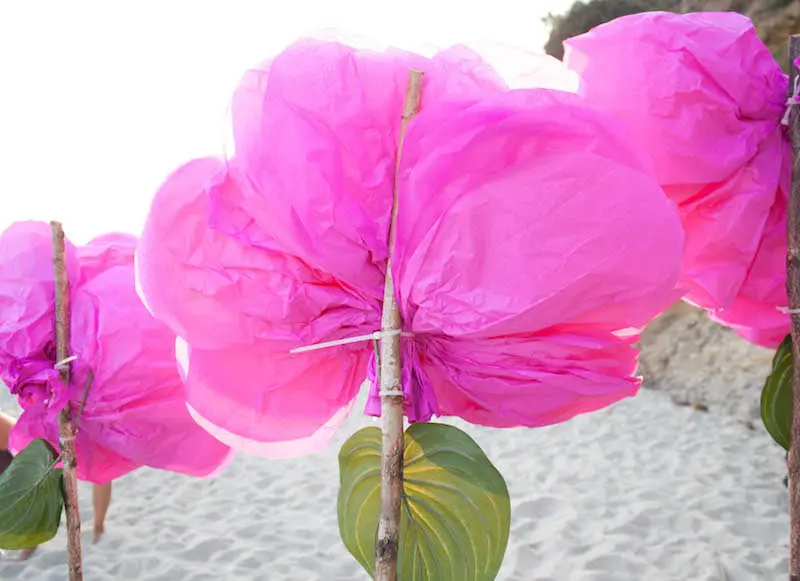
STEP 5:
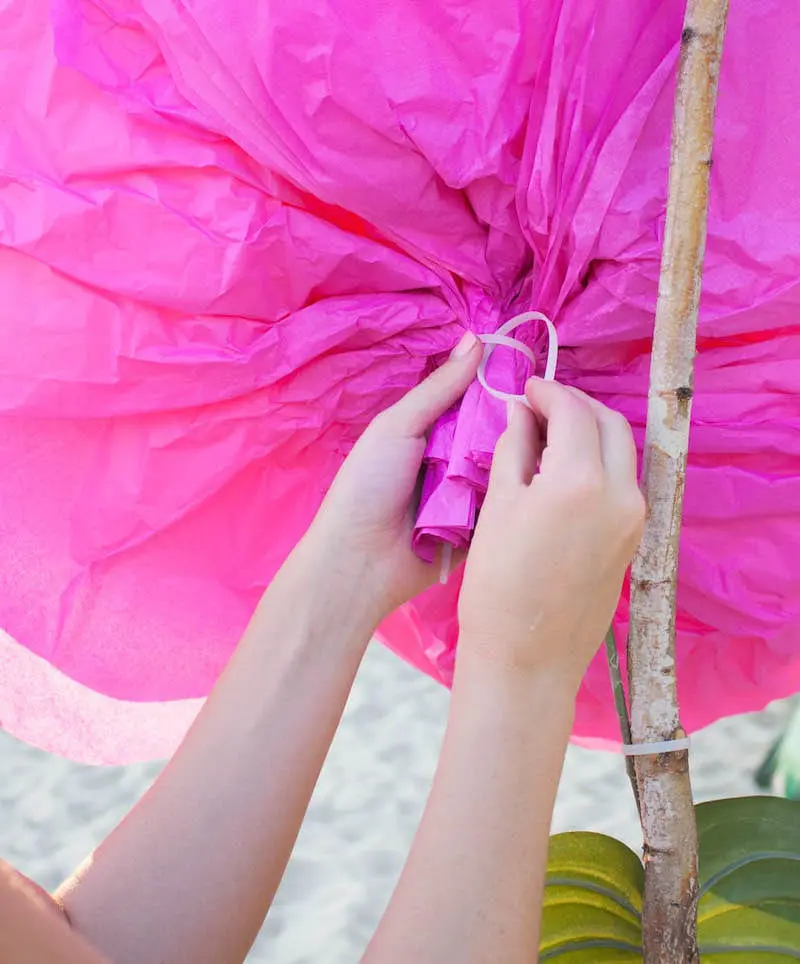
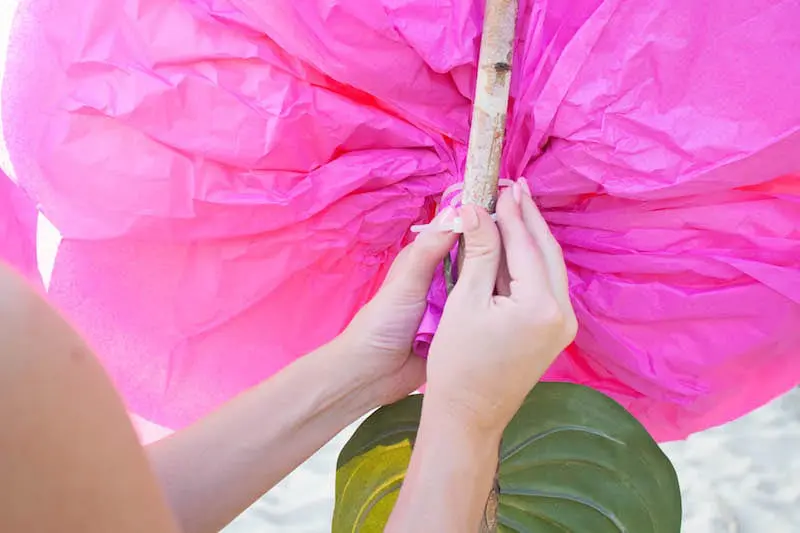
- Now take your big rose and get ready to attach it to the stem! (Again making it super easy with the zip-ties) Loop another one through the one holding your rose all together, loop it around the stem, and then pull as tight as it can go!

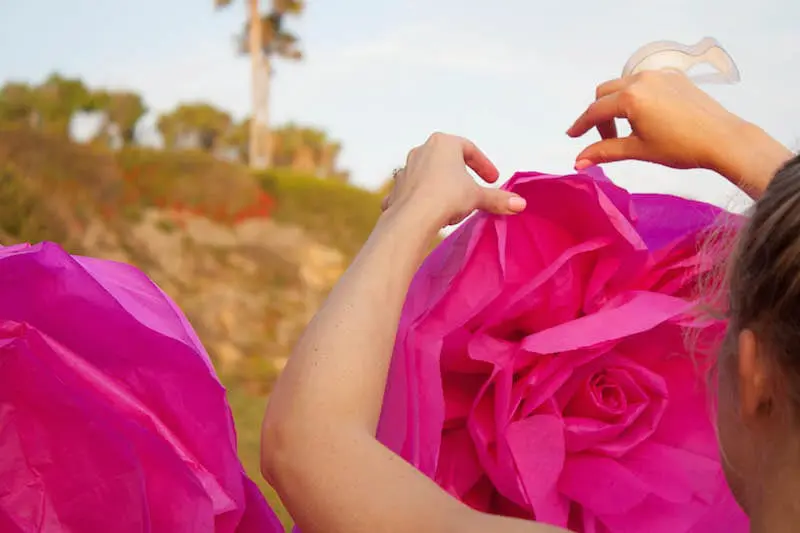
STEP 6:
- Beautification Time: Take a step back and make sure all your petals are fluffed and perfectly spaced out. Don’t be afraid to do a little trimming once you see the whole piece come together. You might want some petals to be smaller than other ones in certain places.
- Also feel free to bring out that double-sided tape to make petals stay in certain spots. Here I gave the top of my rose a little more support to help make sure it stayed upright.
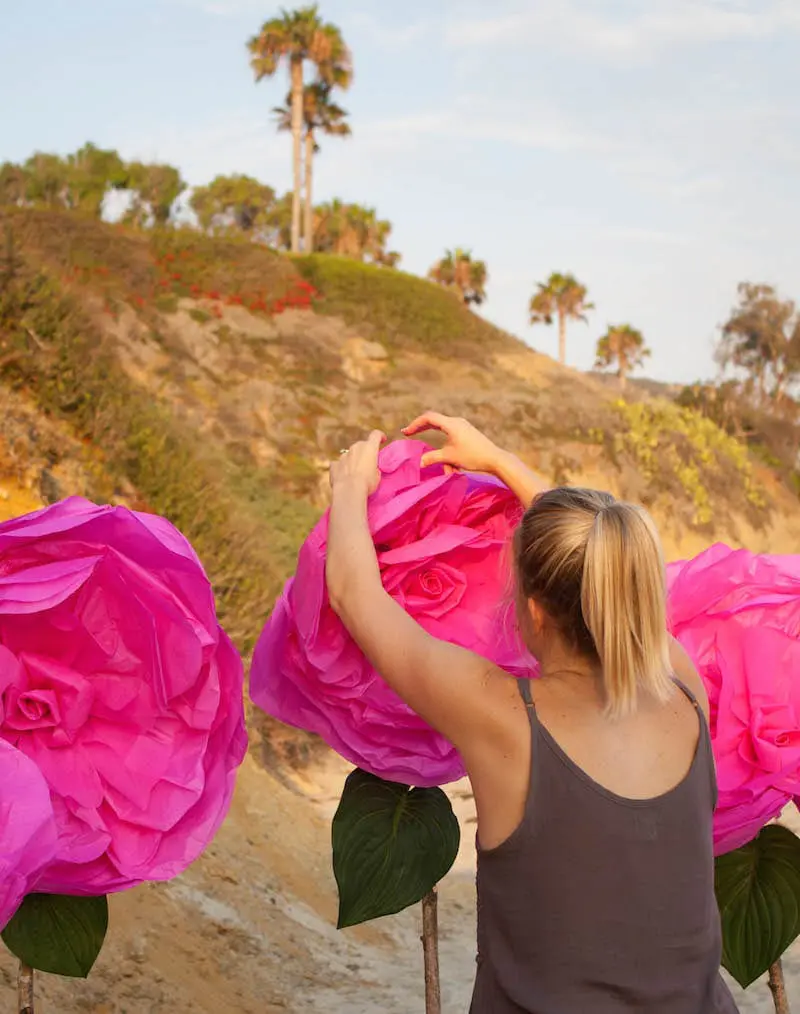
Now make 4 more of those and you have yourself a beautiful backdrop for any special moment you’re having! Here was the final set up for a lovely proposal we did on the beach in Laguna, CA